Showing posts with label photo transfer. Show all posts

Wednesday, June 3, 2015

word soup

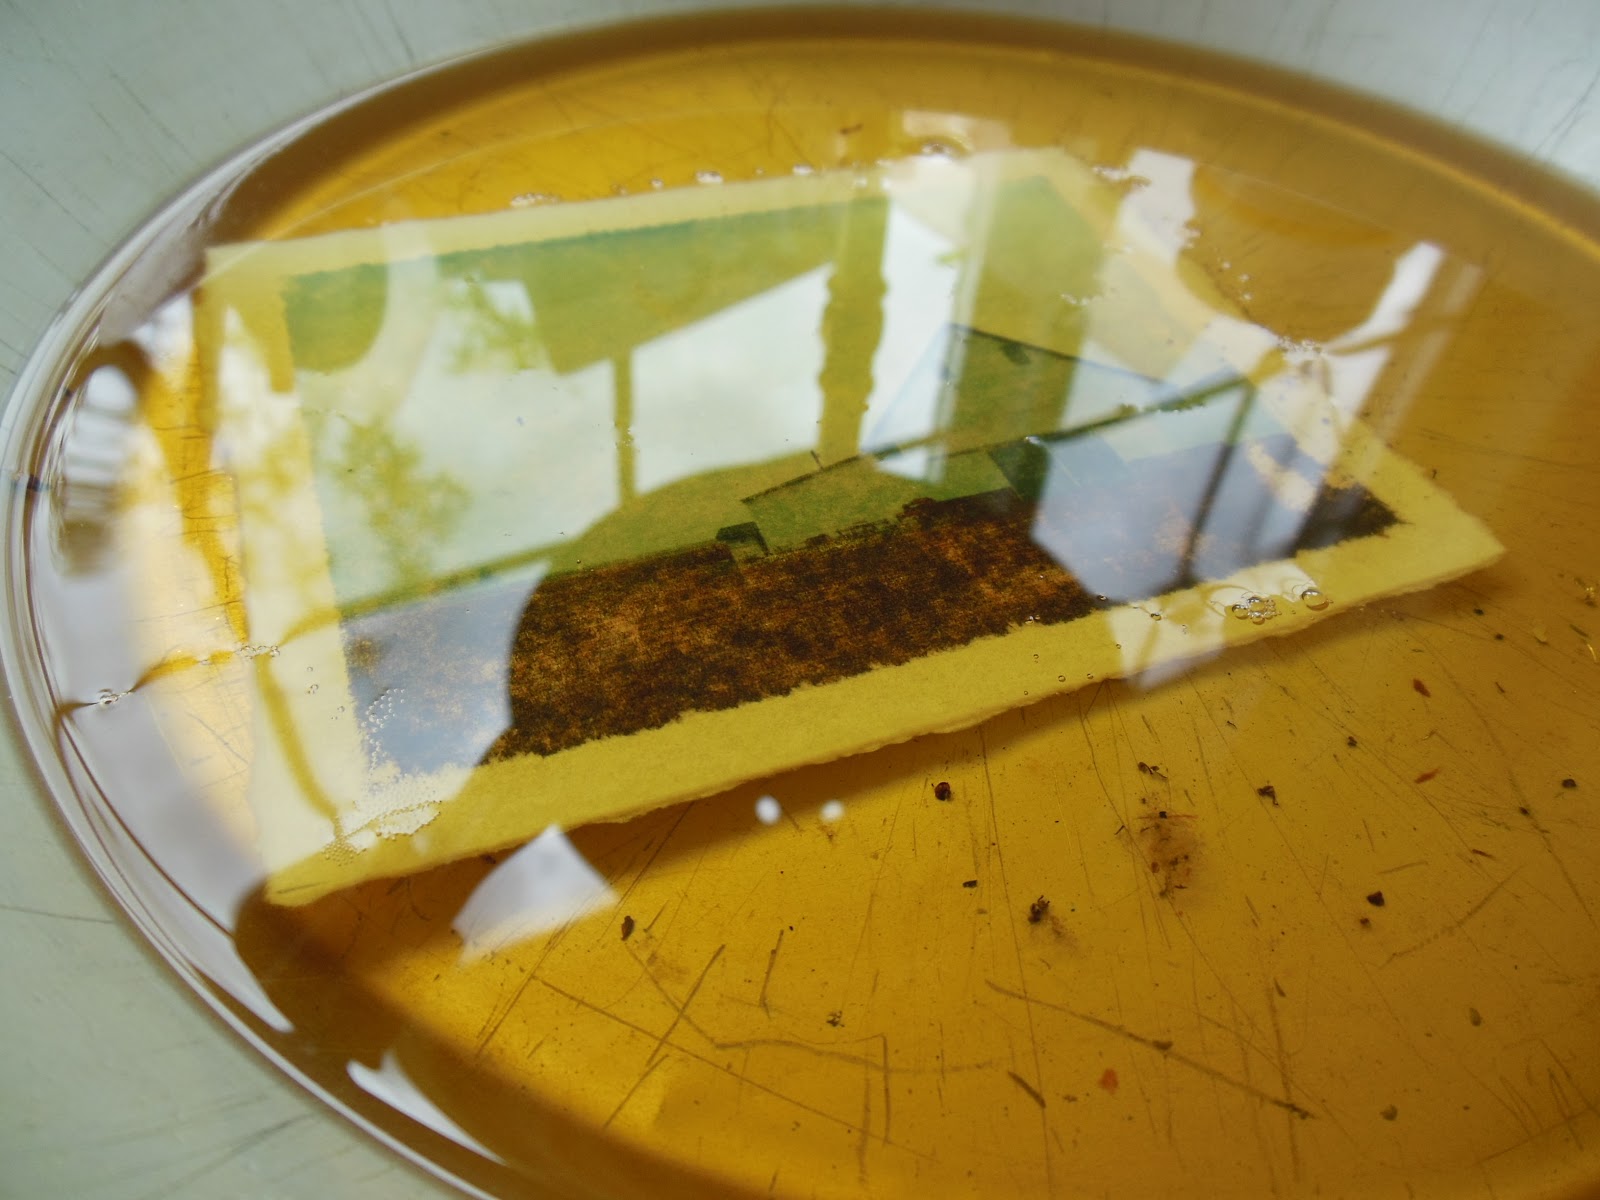
... playing with photo transfers again ...
this was a simple magazine page 
which I transferred to glass 
(the technique is fully explained at the end of this post)
I took all the words found in the image:
Georgetown, theatre, gypsy tea house, shoe sale, no turn on red, the big chill, against all odds, etc. and rearranged them into short found poem of sorts

No Sale On Tea Town

Odd George, the red gypsy, and the big theatre houses,
All turn a chill shoe on us today.

It's fun - if I were an art teacher, or a creative writing teacher - this would be an awesome excercise with kids.
***
Last night I had the pleasure of attending a lecture and book signing with Elizabeth George, who has a new book series for young adults that takes place on Whidbey Island. 
It was inspiring to hear about her creative process. 
She has been writing since the age of seven. Wow - just wow.
***
Photo transfer how to:

Apply several (5-7) coats of Golden Gel Medium to a magazine image, allowing to dry thoroughly between coats (at least 1 hour each time)
Wait 24 hours after applying the final coat. 
Next: soak your gel coated image in water until the paper begins to dissolve and rubs away easily from the gel "skin"
You may now adhere this "skin" to paper, glass, wood, whatever you desire.
Use gel medium as your adhesive.
That's it.

Thursday, February 12, 2015

bordering

Art supply rebel that I am -
expensive mats, frames,  and framing
are not immune to my rebellion

I prefer to do it my own way
These are all my latest photo transfers on canvas board.
With each one I've painted a border.
Copper tape, solder, jump rings, and a short chain finish them off.
I rather like the result.
You might say it borders on something ...

Wednesday, February 4, 2015

old photo redux

I want to show you what I created today.
I started with a color copy of an old photo 
(this picture is of my father-in-law and his twin brother - isn't it cute?)
The color copy is from the copy center (not my printer) and the ink is not water soluble - so I can safely work on it with paint.


First I mounted the photo on foam core.
Then I used watercolor paints to tint the photo.
Next: gessoed a border, upon which I painted a pattern with acrylic paint.
I added the word "twins," copper foiled the edge, and attached jump rings for a chain. 


It now hangs happily in my home.


The story is that the larger boy on the right would take the baby bottle of the boy on the left - hence he is larger. 
But it's just a story.
My guess (as a Mom) is that one boy was quiet and earnest. The other was go go go.
The quiet, earnest boy is my father-in-law. To this day he is a quiet and reflective man - as sweet as they come.

Friday, January 24, 2014

photo transfer

(go to previous tutorials for more detail on this particular process)

I have, in my shop, a custom listing for personalized notebooks with a photo transfer on the cover. An order came in this week, so I took pictures of the process along the way. (I wrote this blog post with photo first, description second - so read what's below each picture to follow along)


I start with the lovely Moleskine brand of notebooks, which I prefer for the stitched binding, inside pocket, good quality paper, size choices, and dependable availability. I use the kraft color notebooks for photo transfers - first coating the cover with Daniel Smith Watercolor Ground. It's similar to gesso, but I like it best for photo transferring.


For photo transfers, I print the picture I want to use on my inkjet printer onto regular printer paper. If there is text, it is important to first flip your image in photoshop.

I paint mod podge matte medium onto the dried watercolor ground, and while the medium is wet, I carefully lay the print face down onto it. Press with your fingers or roll with a brayer to completely and smoothly adhere the paper to the notebook cover. Now the hard part: let it sit for 24 hours. This is hard - but very important. If you don't, the mod podge will still be soft and you'll have a real mess.


Now the fun part. Apply water to your face down photo copy. Your image will magically appear before your eyes.


Let the water soak in for about a minute and begin peeling the paper back. It will peel back in neat little tubes as you roll it under your fingers. This is a layer of paper lifting off, revealing the ink which was embedded into the mod podge.


Let dry (about half an hour) and repeat this process with the water and gently rubbing with your fingers.


Repeat as often as you like - but be careful of rubbing off too much. The edges and corners will usually lose some of the image, but it adds texture and makes your picture more interesting than a straight print would be.

Once I have it where I like it, I apply a thin coat of mod podge to the damp image. The extra moisture helps the acrylic medium to soak into any remaining paper making it more transparent. When it's very dry - I give it about two more hours - I rub beeswax onto it and buff it until it has a certain depth of color that I like.


For this customer, I also made a carrying pouch for her book. It will accompany her as she travels to China in a few months. She had me make one for another trip last year and said the pouch was great for holding everything together and in one place - paper scraps and mementos from her trip - and the book had daily notes and journaling too. Doesn't it make you want to plan a trip? 

Saturday, June 1, 2013

photo transfer tutorial

(beware: lots of photos)


I have been busy the last 2 days creating these, 
and took pictures along the way to show you how I did it

*

(this is by far the easiest method I have found for photo transfer)

you will need:
ink jet printer or copier photographic prints
heavy paper (cardstock or watercolor paper)
mod podge or acrylic medium
medium sized paintbrush
fine grade sandpaper
beeswax (optional)
bone folder
soft rag or towel

1. print your images and cut or tear along the edges removing any white border


(before your next step, check your paper's texture - if it is smooth, don't worry. If it is bumpy, give it a quick sanding to smooth it down a bit. I do that when using watercolor paper)


 2. apply mod podge or acrylic medium to the heavy paper (NOT the print). 
Apply the acrylic about a half inch greater than your image size
3. lay your print face down in the wet mod podge and rub it down firmly with your thumbs


4. let it dry for 4 hours or more (I like to leave it overnight)


5. apply water to the ink jet paper backing - let it really saturate the paper


6. after a minute or so, you can begin rubbing the paper and peeling it off


 7. use a towel to get the last bits of paper


 8. don't worry if there are still some nubbly bits of paper left


9. just sand those bits with your fine grade sand paper


this is how it most likely will look at this point:
(notice the blotchy parts - that is to be expected and is a desired effect)


here are my four transfers before the next step:


10. dip your image into hot beeswax
(I heat my beeswax in an aluminum pie tin in a 300 degree oven)


11. use tweezers to lift it out and drip dry


12. lay your transfer(s) on aluminum foil on a baking sheet and return to your 300 oven for about 5 minutes


 13. when your prints have cooled, use a bone folder to scrape off the excess wax


14. use your soft rag or towel to give them a final buffing. Your prints may feel a little bit tacky from the fresh wax, but after a few days it will have cured and will be smooth and soft as silk.


I like how they look in the light:

*

about the photos:

the woman is from my collection of anonymous old photographs - isn't this an amazing photo?
the text on her photo is from the bible - proverbs 31 - "strength and dignity are her clothing"

the barns photos are all taken by me from various trips up to the Skagit Valley - a rural landscape of lonely buildings in a place full of fog and mist and rain

*

keeping busy and feeling better
xoxo

Saturday, May 18, 2013

Rfrshing

... the e's have been shot out with bullets

are you having a refreshing weekend?
or a rfrshing one, like me?


this is another polaroid emulsion lift
this time on watercolor paper
I allowed the right corner to float and drape as I did the transfer
it really works well with this rigid composition
don't you think?
I think I'm due for some float and drape in my own life
... looking forward to Sunday afternoon ...
that's when I take a big old nap

Friday, May 10, 2013

a new kind of image transfer

... well new to me at least

polaroid emulsion lift has been around for several years
but I never had a polaroid camera to play with
another one of the things my dad gave me is an old 600SE
(or goose)

here are some snaps I took yesterday
-rather ho hum-


but, transfer them to something interesting
like beach glass and pottery
(flotsam and jetsam)


and the magic happens


if you are interested in the how-to's:
google Polaroid Emulsion Lift Technique
I didn't find any tutorials for transferring the image to glass or ceramic
so I just did it the same way I saw people doing it for paper

*
and a shameless plug:
these pieces are available in my Etsy shop
and any new sales will fuel my new film craving
xoxo  :)  xoxo

Monday, November 5, 2012

photo transfer on glass

I tried something new today
have you seen my old tried and true photo transfer technique that I use on watercolor paper?
(click here for the tutorial)
well, I thought it might work on some of my beach glass


it actually works better on beach glass than it does on paper


the two pieces pictured below are from my outing on the trail a couple of days ago:


here you can see how different they all look depending on the thickness of the glass:


the pieces I chose were pretty clear - the roughest one being the one on the far right

the glass was very weathered and gives the image a foggy look to it
but if you flip it over it's really quite visible:


I am so pleased with these results!
I will definitely be making lots more of these!

Thursday, March 22, 2012

photo transfer


I made a photo transfer of my great grandparents several weeks ago

(but I was quite unhappy with the results)

so, yesterday, I add lots of color with watercolor pencils

and burnished it with beeswax

now I'm happy


for more about photo transfers
follow the "photo transfer" label

Wednesday, June 15, 2011

brothers in arms

you may remember an earlier post "photo transfer - 3 ways"
(I had featured this same photograph of my dad and his younger brothers)
for this quilted piece, I used fabric transfer paper 
(made by Avery and found in the printer paper department)


I used tea bag paper alternating with old music sheets as a border
the colored fabrics are my own hand dyed muslin


and, using my new typewriter, I made a miniature banner 
it says:
brothers in arms
(I thought it was funny the way the brothers aren't holding hands, they're holding arms)