(beware: lots of photos)

I have been busy the last 2 days creating these,
and took pictures along the way to show you how I did it
*
(this is by far the easiest method I have found for photo transfer)
you will need:
ink jet printer or copier photographic prints
heavy paper (cardstock or watercolor paper)
mod podge or acrylic medium
medium sized paintbrush
fine grade sandpaper
beeswax (optional)
bone folder
soft rag or towel
1. print your images and cut or tear along the edges removing any white border

(before your next step, check your paper's texture - if it is smooth, don't worry. If it is bumpy, give it a quick sanding to smooth it down a bit. I do that when using watercolor paper)
2. apply mod podge or acrylic medium to the heavy paper (NOT the print).
Apply the acrylic about a half inch greater than your image size
3. lay your print face down in the wet mod podge and rub it down firmly with your thumbs

4. let it dry for 4 hours or more (I like to leave it overnight)

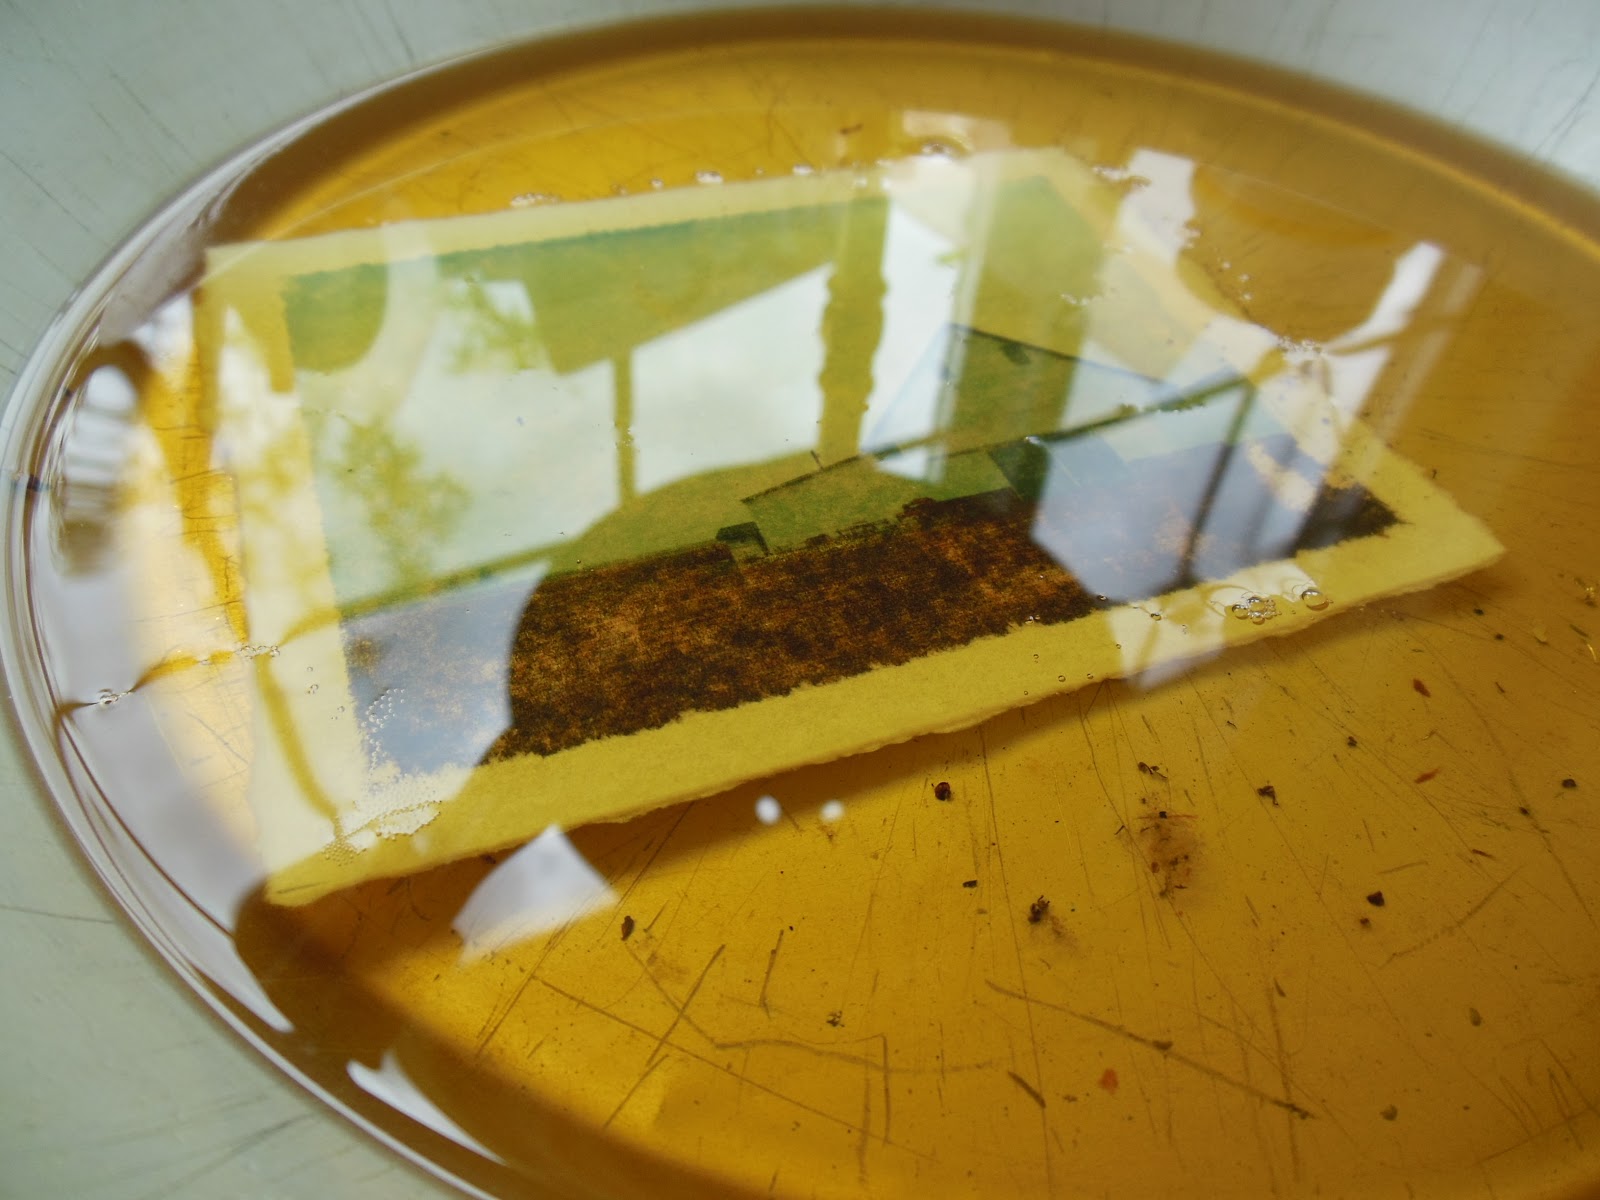
5. apply water to the ink jet paper backing - let it really saturate the paper

6. after a minute or so, you can begin rubbing the paper and peeling it off

7. use a towel to get the last bits of paper

8. don't worry if there are still some nubbly bits of paper left

9. just sand those bits with your fine grade sand paper

this is how it most likely will look at this point:
(notice the blotchy parts - that is to be expected and is a desired effect)

here are my four transfers before the next step:

10. dip your image into hot beeswax
(I heat my beeswax in an aluminum pie tin in a 300 degree oven)
11. use tweezers to lift it out and drip dry

12. lay your transfer(s) on aluminum foil on a baking sheet and return to your 300 oven for about 5 minutes

13. when your prints have cooled, use a bone folder to scrape off the excess wax

14. use your soft rag or towel to give them a final buffing. Your prints may feel a little bit tacky from the fresh wax, but after a few days it will have cured and will be smooth and soft as silk.

I like how they look in the light:

*
about the photos:
the woman is from my collection of anonymous old photographs - isn't this an amazing photo?
the text on her photo is from the bible - proverbs 31 - "strength and dignity are her clothing"
the barns photos are all taken by me from various trips up to the Skagit Valley - a rural landscape of lonely buildings in a place full of fog and mist and rain
*
keeping busy and feeling better
xoxo
33 comments:
Those look awesome. Thanks for the detailed tutorial. This looks like something I'm definitely going to try.
Extraordinary -- I think, though, that I'd like to visit your etsy shop and purchase! Are you going to put any of them up there?
Thank you so much for this Kimmie, I've used acrylic medium for transfers before but never thought to coat them with beeswax ... brilliant :D
that is a glorious extension on the process of image transfers... I have bookmarked this to have a bit of a play at some stage... gorgeous...xx
it looks great! thanks for sharing
I love the final step ...adding the bees wax on top of the images...you are a generous giving artist! Peace, Mary Helen Fernandez Stewart
I love your barn photos, and how they look sewn together and letting in some light. Beautifully done and thank you so much for sharing your process.
So cool! Such lovely results. Don't think we can get beeswax here. A friend wanted to make her own candles but can't get any of the supplies. Have a wonderful day. Tammy
This is a wonderful technique! I have done this, but I usually use fabric to transfer onto.
Transferring is such a fabulous thing to do and there are so many substrates you can transfer to.
The transfer that appeals to me the most is the Polaroid one you did recently.....but I don't have any of those type of photos!
Thanks for showing all the steps.
Xxx
Sue
Thank you, thank you, thank you, thank you! Oh, how I love how you do this and this is a MUST for me, and I am grateful to you for sharing this! You are a master of this technique Kim! I will be trying!Your photos and style are stunning!
Thanks for the tutorial ! Yes, lovely photos!
I will love your tutorial - but I have to wait for the end of my holidays - which started just today, far away from home - and will not end before July. Thank you so much for posting this tutorial.
Thank you for this great tutorial!! I love your lovely results!
I am glad you are feeling better Kim. Thank you so so much for taking the time to share this with us. I am going to go out and get some beeswax and a pie tin. I was not sure how to melt the wax and that is what has help me back for so long. I have a favorite photo I took of my bike in the Flint Hills here in Kansas and that's the first one I will try. I will do a blog post and link up to you when I do it. It may be weeks though. Projects galore, but I am really excited to try this. Thank you again!!!
Sending you
Peace
Love
Light
all ways dear Kimmie
Thank you for sharing and inspiring and for being you ♥
oxo
p.s. your transfer creations are beyond magical!
Thank you for sharing this tutorial. I really want to try this technique. The way the lady in the photo is posed she almost looks like a Greek or Roman statue. Just beautiful.
Glad to hear things are better. Love the results and thanks for the tutorial. I've done the mod podge transfers but never used the beeswax. I love finding old forgotten photos in dusty out of the way shops or flea markets. Makes me sad in a way though, knowing they were someone's family at one time. What happened?... always crosses my mind. I guess my photos will probably end up in an old dusty shop one day too. :) Have a good day Kimmie.
I'm hoping you are doing better.... sending good thoughts your way. Love the tutorial... I'm SOOOO doing this!
Amazing !!! What a fabulous and concise tutorial. Thank you so much for sharing this. Love the end results and the technique looks very doable. I just have to muster the patience to wait 4 hours or more for the print to dry. Glad you're feeling better Kim. xx
just beautiful i have tried that transfer method any number of times and it just doesnt work for me. you have magic hands.
the beeswax method though i have not tried. your pictures come out so wonderfully. you are truely talented
Fantastic tutorial. I think the best part is the beeswax. It gives that true antique feel and smells just wonderful. xox
I happy to hear your feeling better. I've had a bout of almost depression like feelings. Not something I've enjoyed. Let's hear it for creating and the sun shining!!
It's good that you are feeling better. I'm sure it helped create this super tutorial. I've never had much luck with transfers that were made from ink jet printers, but yours are clearly fantastic.
I think the magic is in the beeswax, though. It seems the beeswax makes the transfer translucent and gives each piece a bit of mystery. Great job and incredible photos to document the tutorial.
L.O.V.E loooove these...and sooo glad you are feeling better! xx
I am so excited. I will be doing this today. Thank you for the info.
Fantabulous !!!!
Thank you for so generously sharing your technique.
Light and love to you, Fine One.
Thanks for always sharing such wonderful tutorials Kim! Would you ever consider putting some of your tutorials under a header or side bar for easy access? I always remember your fun things to try, but don't always get to it until later and end up going back to look for it. Just a thought. Always love visiting here!
…of all the transfer tutorials out there, this one stands out for clarity and the wax is a brilliant idea!
This is an amazing tutorial! I have to agree with everyone else who says this is the best photo transfer tutorial I have seen! I love the encaustic added especially. Small world again as I found this on PINTEREST, Fran
hi, ive just discovered this, and am wandering if its the exact same method for transfering onto glass or if it changes, how the method changes for glass?.
It's the same except for the beeswax
These are amazing! Cant wait to do this myself, thanks for posting :)
Marie
Post a Comment