I made the picture below using the photo transfer technique I describe HERE:
in this next picture, I have added colored pencil to enrich the image:

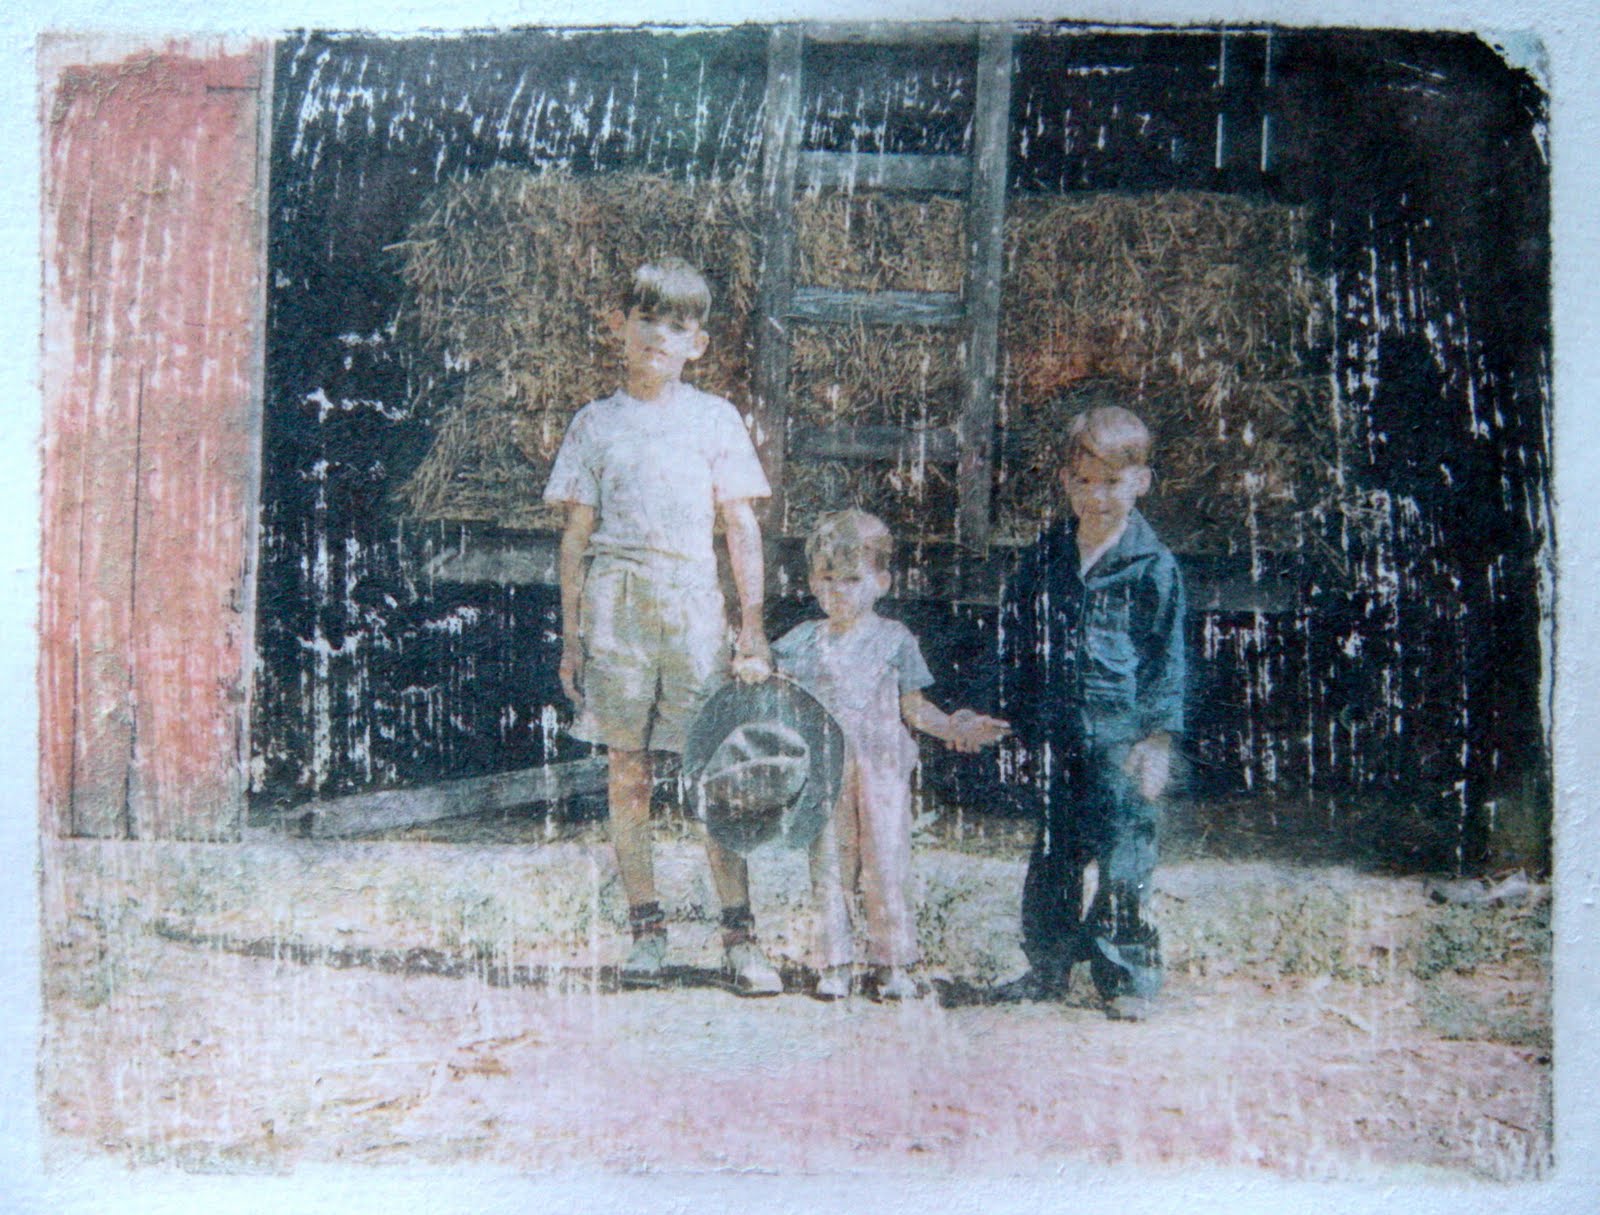
and then, I added beeswax, my all time favorite finishing product:

because of the large size (about 6X8) I couldn't dip it in beeswax
so I poured the melted beeswax over it
then, because it was an uneven coating,
I set it on foil and put in a 180' oven until the wax melted evenly over the whole thing

I scraped off some of the extra wax with a bone folder
and then buffed it with a rag

it really added the depth I was looking for
*
p.s. this a picture that was taken probably around 1945
it is my dad (on the left) and his brothers
cute, huh?!
I love how it turned out
:)
18 comments:
Wonderful outcome and I love all the techniques. In Judy Wise's encaustic class in Portland last year (Art and Soul retreat) we used either a hair dryer or a heat gun to melt the wax and get it to run over the whole piece...
Yes, cute cute and cute.
By jove,Kimmie! I think that you've managed to perfect this very imperfect and technique! What a gorgeous result!!! Hugs, Terri xoxox
Wonderful. I keep trying transfers to no success but maybe with my new inkjet printer the ink will be stronger. I'll have to try.
After watching an Encaustic instruction DVD I have been afraid to go back to using wax. They have so many safety directions but maybe they had to. Ventilation. fire extinguishers. Etc.
I am not sure if you had an encaustic tutorial previously? But just wondering how you melt your wax. Do you do the wax working in your kitchen for small projects like this?
In the DVD they have a sort of electric frypan sized melter and they ease the paper into the melted wax bit by bit.
Like Lynn I use a heat gun to melt the wax and also for small areas a quilting iron. Or you can use an old regular iron you won't use for ironing clothes anymore.
anyway it came out fabulous
ps I posted a video of my walk to the Cloutie glen today.
You are a genius! I am totally impressed with the way you got all the excess wax off the picture without the use of one of those overpriced irons. Great post and a wonderful lesson for someone (like myself) who loves to work in beeswax, but doesn't have the proper equipment.
Alright, I love this :) I bought beeswax on my last shopping trip for stamp stuff and you have inspired me and now I'm really going to try this!
The photo is great, btw!
I love it, too! You should take commissions!
just beautiful! and I usually use a mini quilting iron to smooth it out...
I have read and reread photo transfer techniques and even belong to a photo transfer group in yahoo...I've only done ones to tiles for coasters and a packing tape transfer. This turned out beautifully.
What a wonderful technique and the finishing ,ales it really special. Thanks for sharing. xox Corrine
oh it looks so good ..nice to see each step .. it must have a lovely fragrance as well~~
What a cool technique! You are so smart to take pictures along the way! I never think to do that. I get way to caught up or my fingers are just to gooey and I'm not about take the time to clean them.
absolutely precious and the beeswax truly enriches the image so much
lovely of you to share this with us dear Kimmie!
Happy Weekend to you and yours!
oxo
I love this! I am always looking for new ways to use copies of some old photos I have. Such a cool picture, thanks for the transfer tips!
very very cool technique! i love the addition of the colored pencils and beeswax...
Oh, thank you for sharing this. I have never had good luck with transfers, but now I will try again! I love seeing all that you are up too, your blog is looking very beautiful and so is your banner. Happy May to you, roxanne
Wow! That is so neat!
I posted a link to these tutorial today on my blog.
Nancy Ward
PaperFriendly
http://www.nancywardcrafts.com
Love your special touches Kimmie. They work so well! And, what adorable boys your Dad and his brothers were!
Post a Comment